

Getting Started
Hello and welcome to using the AlphaBot 2 robot! This guide will walk you through basic operations such as unboxing and power-on, helping you get started easily and get to know your new partner that will work alongside you.
Unboxing
Section titled “Unboxing”After receiving the AlphaBot 2 packaging box, follow the steps below to unbox it:
-
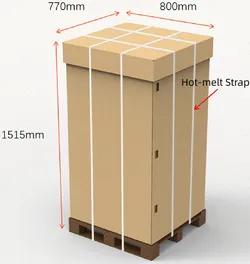
Inspect the packaging box and ensure it is intact. The robot is packaged in a corrugated carton with a wooden pallet, and its dimensions are shown in the figure below.
-
Cut the external hot-melt strap and remove the top cover.

-
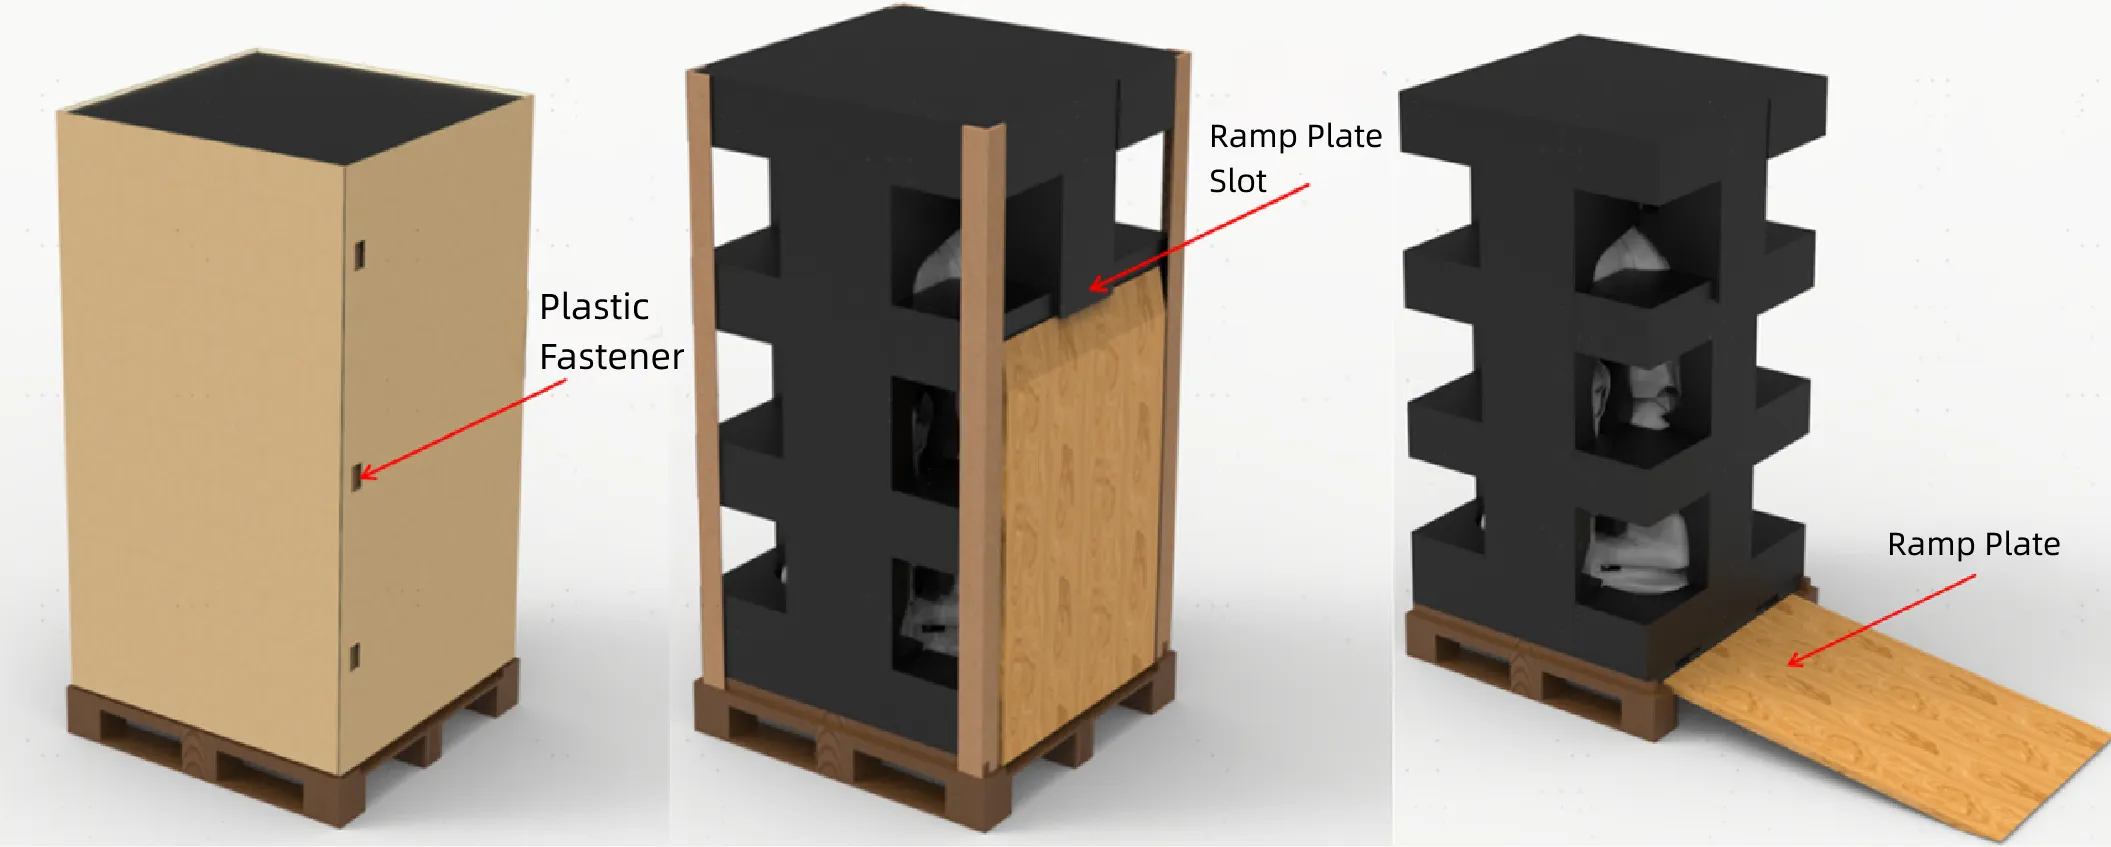
Press the plastic fasteners, disassemble and remove the side coaming of the packaging. Open the ramp plate slot and lower the plate.
-
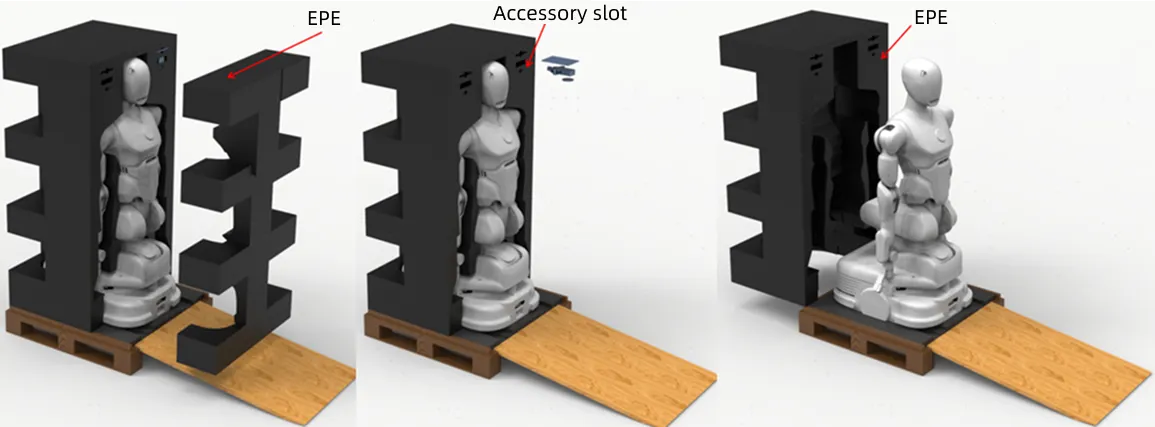
Remove the front EPE protective inner liner. Take the accessories out of the accessory slot. Then remove the rear EPE protective inner liner. Roll the robot down the ramp panel and place it on a flat ground surface.
-
Inspect the main robot body and accessories for any visible damage or defects. If any issues are found, contact us promptly.
Power-On
Section titled “Power-On”After completing the unboxing procedure, follow the steps below to power on the robot:
-
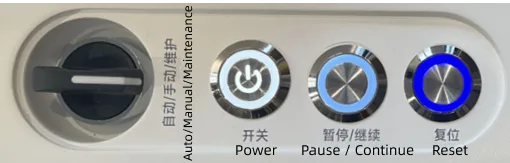
At the chassis, press and hold the power button for 1.5 seconds to power on the robot. All buttons lighting up indicates successful power-on.
-
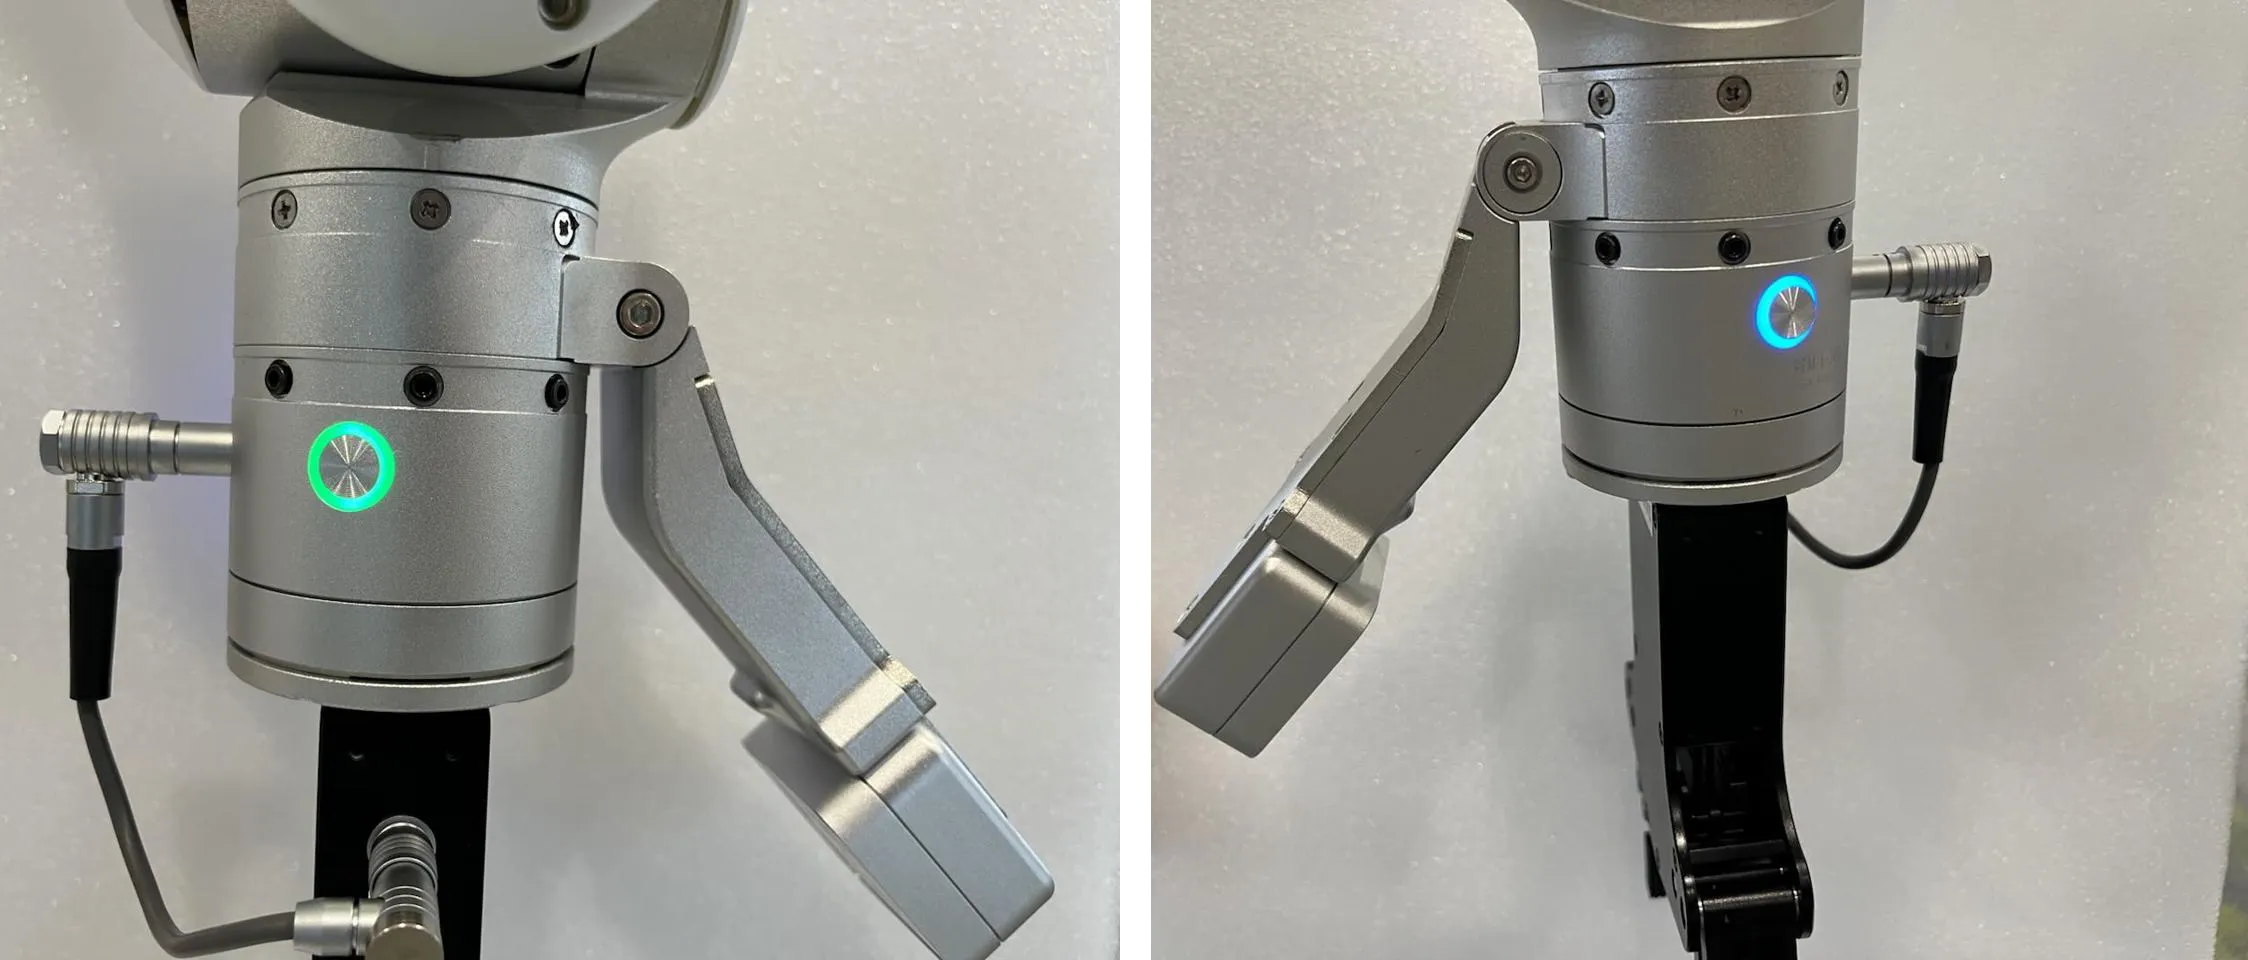
After waiting for 1 minute, the blue/green button at the end of the robotic arm lights up, indicating that the robotic arm is successfully powered on, and then you can start using the robot.
Next, please refer to the Hardware Introduction to learn about the hardware structure and related parameters of AlphaBot 2, or jump to Common Operations to start using the robot to complete various tasks.